
Purge CloudFlare Cache with PowerShell and Azure DevOps
Originally when I setup my blog on Static website hosting in Azure Storage I went with Azure CDN because I wanted to have an SSL endpoint. As of right now, you cannot do custom SSL with static website hosting unless you use Azure CDN.
But then I hit another snag, you cannot redirect the root domain and redirects in general were a bit too complex for a simple project like this one. There is a user voice suggestion for this feature but it remains under review. This started to bother me because I wanted to do redirects with SSL but couldn’t because the I could not install the certificate generated by Azure CDN on the Linux VM I decided to do the rewrites on. All my previous articles were on https://hammertime.tech breaking all of my links from places like Google and Bing, or even worse resulting in the dreaded SSL error.
Fast forward a bit to Cloudflare. In a previous life I used their free plan to protect against attack but that free plan also offers 3 free redirects AND a free SSL endpoint. This meant I could now redirect https://hammertime.tech to www. where my CNAME is setup for Azure Storage. It also meant I could redirect a bunch of my other domains like hammertimetech.com and have all my URLs work how I wanted. Nobody else will probably notice this.. but it’s one of those things I wanted in place - I am weird like that!
But I digress, now that I am on Cloudflare I wanted to make sure that the Cloudflare CDN cache has my latest content whenever I publish. This is probably overkill in some places because Cloudflare seems to pick up on new content fairly quickly. But at least at the end of my release pipeline I’ll know everything is published on the CDN.
This guide assumes a few things are already done.
- You’ve setup a Cloudflare account and your domain is pointed to their name servers for hosting. You can find instructions in Cloudflare 101.
- You’ve already setup your CNAME to point to Azure Storage (or other endpoint).
- You have obtained your API Token for the v4 API
- You already have a release pipeline setup, see my previous article for more information.
Obtain your Zone ID
Once all this is done you’ll need to get your Zone ID, I wrote simple PowerShell function to do this available on GitHub. If you choose to go that route it’s as simple as running the commands to retrieve the ID for your specified domain.
Get-CFZones -Token $APIToken -EMail $AccountEmail |where Name -eq hammertime.tech

Id           : your-idhere
Name         : hammertime.tech
Status       : active
Paused       : False
Name Servers : {april.ns.cloudflare.com, dane.ns.cloudflare.com}
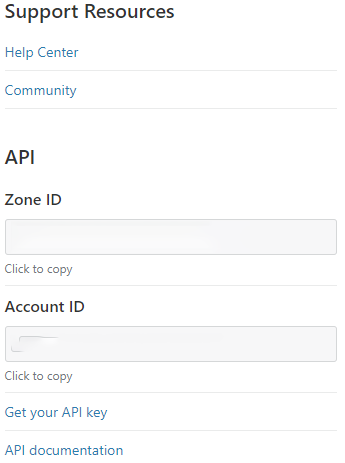
You can also obtain the Zone Id from the dashboard, once logged click on the domain you want to manage. This will bring you to the overview page where you’ll see the Zone ID on the bottom right.
Purge your Cache
Now you have all the information needed to purge the cache for your desired domain. I’ve written a simple PowerShell function that hits the Purge All Files API endpoint, you can find it here.
Let’s go ahead and run it locally to make sure it works as expected, then we’ll get it into our release pipeline. The screenshot below shows PowerShell 6 but it works just fine in 5.1.

As long as you get a message that things are successfully cleared you are ready to add it to your release pipeline. If you get an error back, you’ll need to double check your Zone ID, API Key, or account E-Mail.
Integrate with your Release Pipeline
In my previous article I covered how to create a release pipeline to deploy Hexo to Azure Storage. The first thing you’ll want to do is edit your existing release and add the variables you will need to purge the cache.
In the release editor, click the variables tab on the top.
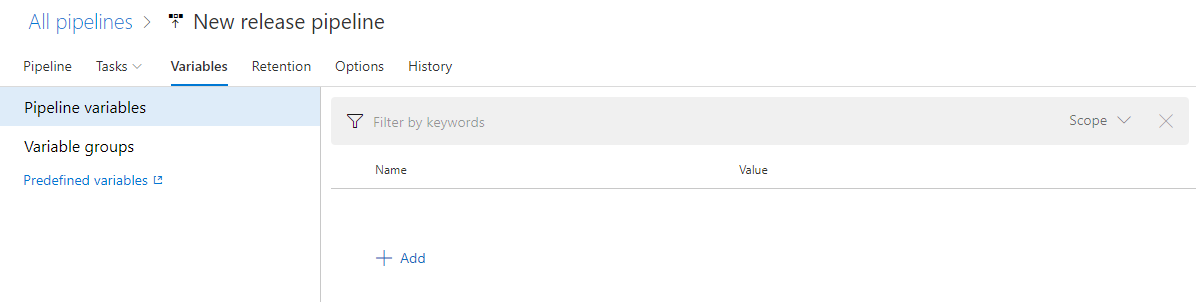
Add three new pipeline variables cfemail cftoken and cfzone with the scope of Release. You can choose which one of these you want to be hidden by clicking the lock to the right of the value. I’d recommend hiding your token and zone. Go ahead and enter in the relevant values that you obtained earlier.
Note: The values of hidden (secret) variables are stored securely on the server and cannot be viewed by users after they are saved. During a deployment, the Azure Pipelines release service decrypts these values when referenced by the tasks and passes them to the agent over a secure HTTPS channel.Microsoft: Default and custom release variables and debugging

Armed with your new variables you are now ready to add the purge step to your release pipeline! Now, navigate to edit your release task (this is the task that completes the blob copy) and add a new PowerShell task. Name it Purge CloudFlare Cache, select Inline and paste the following.
function Invoke-CFPurgeCache {
    param (
        [Parameter(Mandatory = $true)]
        [string]$Token,

        [Parameter(Mandatory = $true)]
        [string]$EMail,

        [Parameter(Mandatory = $true)]
        [string]$Zone
    )
    $APIURI = 'https://api.cloudflare.com/client/v4'
    #Build required header for authentication
    $Headers = @{
        'X-Auth-Key'   = $Token
        'X-Auth-Email' = $EMail
    }
    #Build required payload - can be later expanded to purge specific files.
    $Payload = @{
        purge_everything = $true
    }
    #Make the payload JSON friendly
    $PayloadJSON = $Payload |ConvertTo-Json

    try {
        Write-Verbose -Message "$(Get-Date) :: Attempting to flush CloudFlare Cache for $($Zone)" -Verbose
        $requestResult = Invoke-RestMethod -Method Post -ContentType application/json -Headers $Headers -Uri $APIURI/zones/$Zone/purge_cache -Body $PayloadJSON -ErrorAction Stop
        if ($requestResult.success -eq $true) {
            Write-Verbose -Message "$(Get-Date) :: Successfully cleared cache for zone $($requestResult.result.id)" -Verbose
        }
        else {
            Write-Verbose -Message "$(Get-Date) :: Failed to purge cache for $($requestResult.result.id)" -Verbose
            Write-Verbose -Message "$(Get-Date) :: Errors encountered $($requestResult.errors)"
        }
    }
    catch {
        Write-Error $_
    }
}

Invoke-CFPurgeCache -Token $(cftoken) -EMail $(cfemail) -Zone $(cfzone)
This will load the function, and then call the function with the variables you defined. Your end result should look similar to the following:
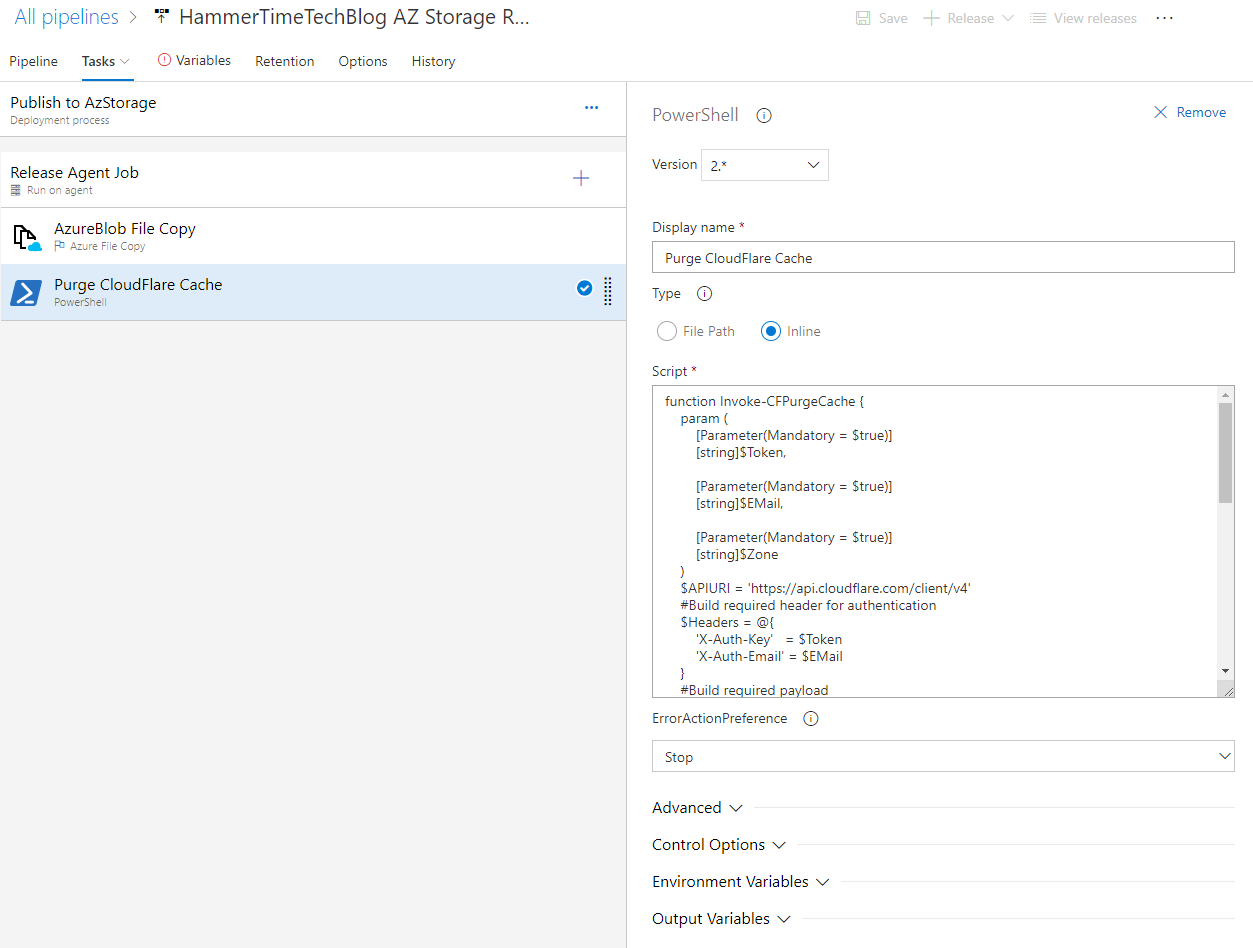
At this point you can either trigger a new build or release to see if your fancy new release step is working properly! You can either watch the job as it happens or review the logs after it completed. You should see output similar to the PowerShell screenshot above which will indicate it either completed or failed.
Bonus Cloudflare Redirect
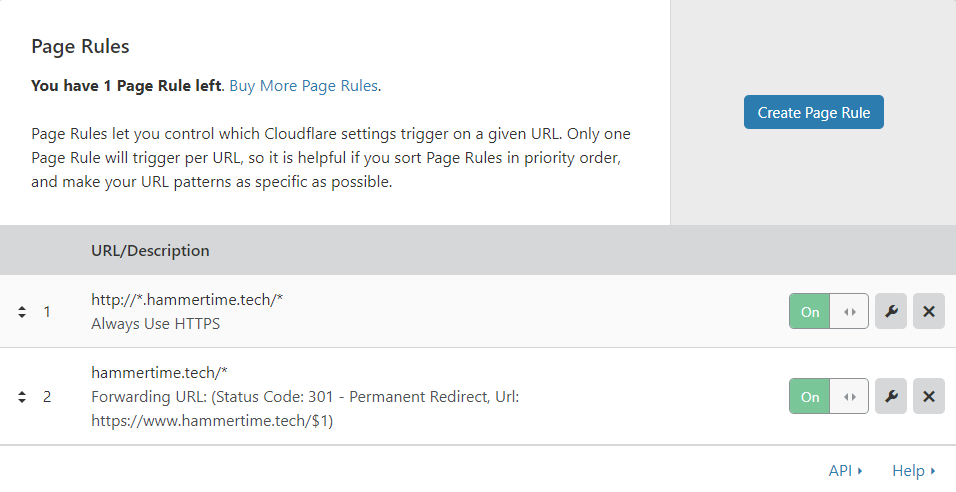
Earlier in the article I mentioned that one of the reasons I chose Cloudflare is so I could get all the redirects I needed. You get three rules with their free plan which is really all you need to force https and do root domain redirects.
In your Cloudflare dashboard navigate to the page rules tab, that’s where you can add page rules, below are what I use for hammertime.tech